1.7. Managing GeoPackages
In this section we will see how to load the layers from GeoPackage and shapefiles and how to remove the loaded layers from QGIS. Besides, we will see how we can add new layers to an existing GeoPackage and how to remove them from GeoPackage. There are multiple ways to load layers from GeoPackage, but the most effective way is to create a connection with GeoPackage (Fig. 1.7.1). To do so we first need to activate the Browser panel as shown in section 1.6 - Fig. 1.6.2. Afterward, in the Browser panel right-click on GeoPackage (1) → New Connection (2). Navigate to the folder where GeoPackage is saved and open it.
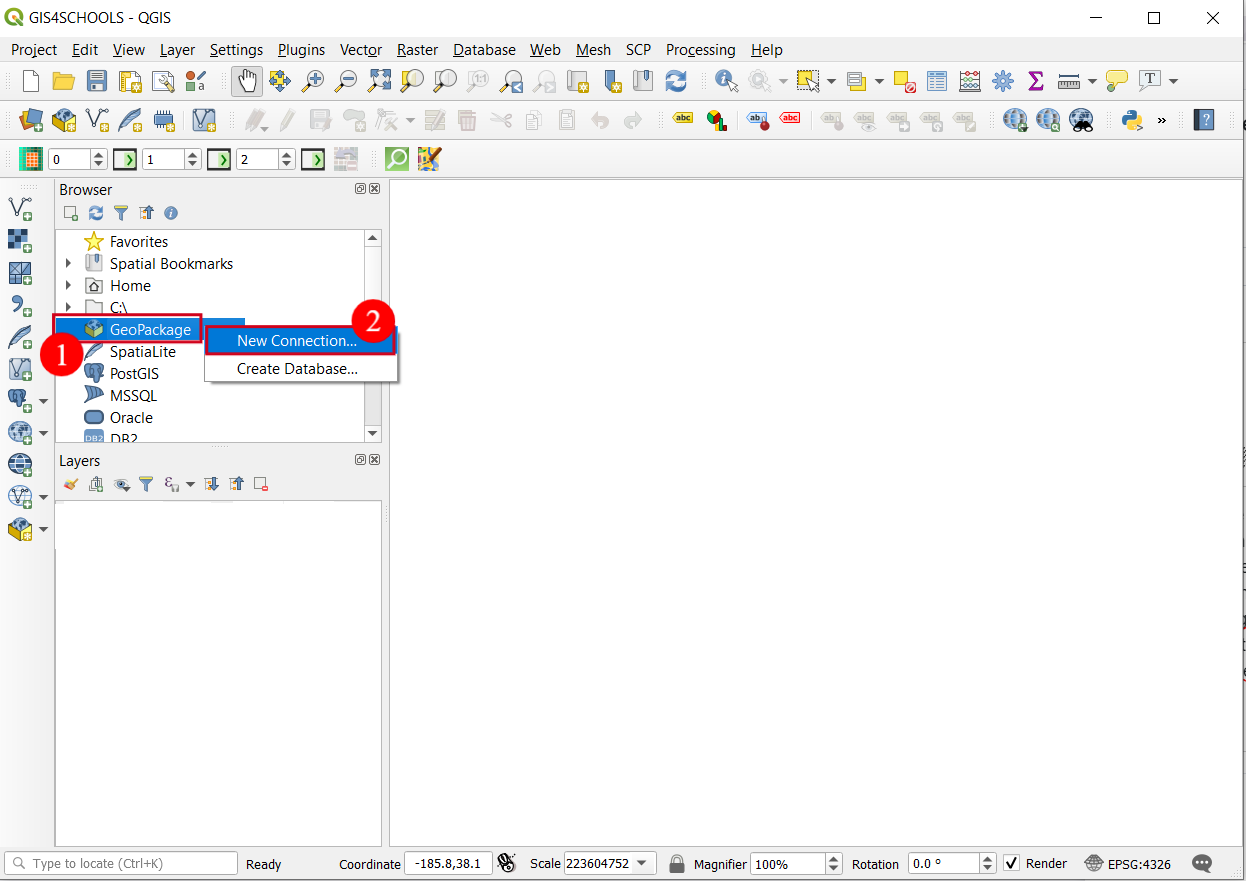
Fig. 1.7.1 – Create a connection with GeoPackage
If we click on the arrow next to the name of GeoPackage we will visualize the list of all the layers included in the GeoPackage (Fig. 1.7.2). By double-clicking on the name of a layer it will be loaded into QGIS and it will be visible in the Layers Panel. For the following exercise, we need Municipalities_OSM, River_network, and Temperature layers, so double-click on each of them to load them in QGIS.
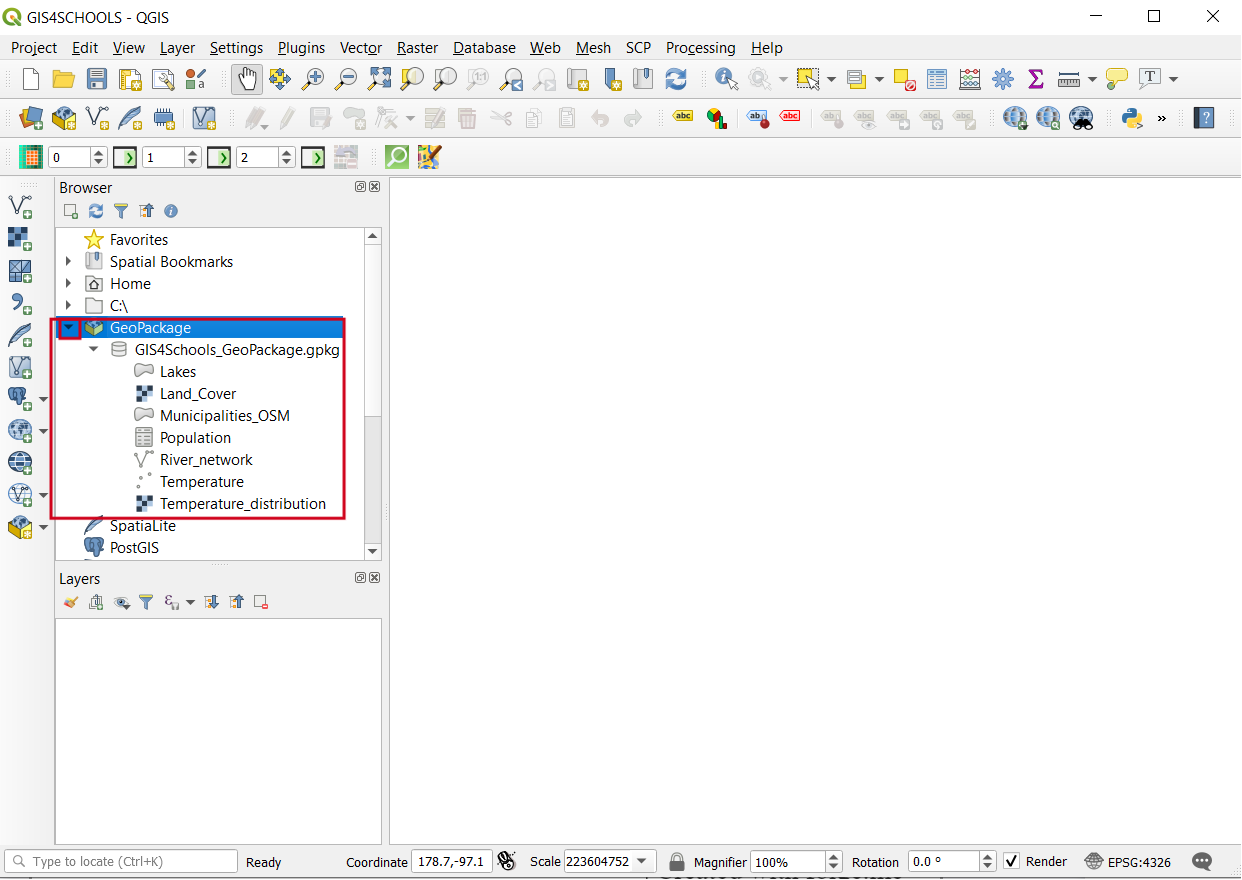
Fig. 1.7.2 – Load layers from GeoPackage
Shape files and other types of vector data can be loaded by navigating to their location using Browser panel, but there are also other ways. One way is to click on Layers → Add Layer → Add Vector Layer (1), navigate to the vector folder (2), click on Add (3) button to load it to the QGIS and Close (4) to stop adding layers (Fig. 1.7.3).
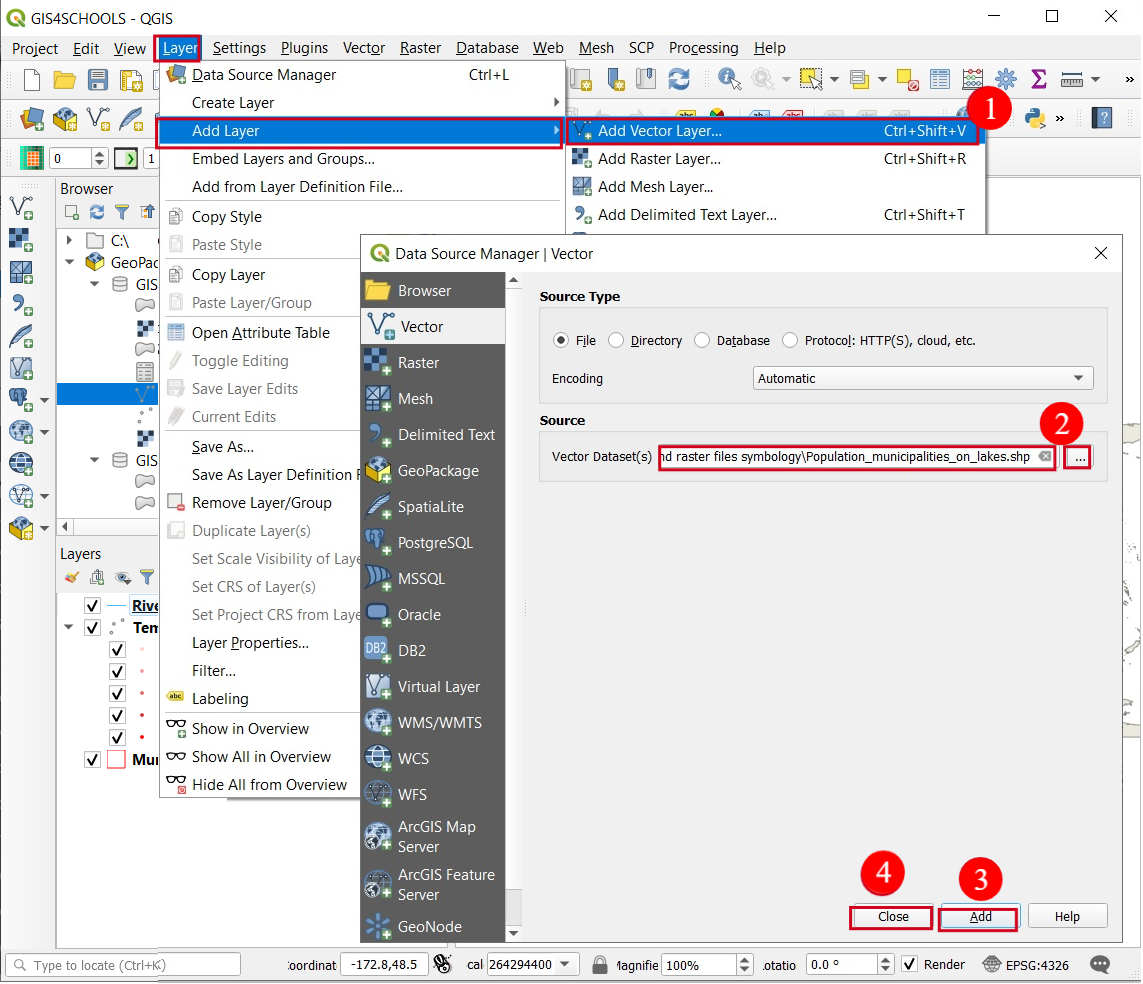
Fig. 1.7.3 – Load shapefile to QGIS
Hereafter is an example on how to add a new layer to GeoPackage and how to remove it. To add a layer to GeoPackage (Fig. 1.7.4) right-click on a layer to be added (e.g. Population_municipalities_on_lakes) to Geopackage then click on Export → Save Feature As (1). Specify Geopackage Format (2), then browse an existing GeoPackage file (e.g. GIS4Schools_GeoPackage.gpkg) to which to add a new layer (3), and specify the new Layer name (4). If there is need, change the CRS (5) and select only specific attributes that we want to keep (6). Click on OK (7) to save a layer in a specified GeoPackage.
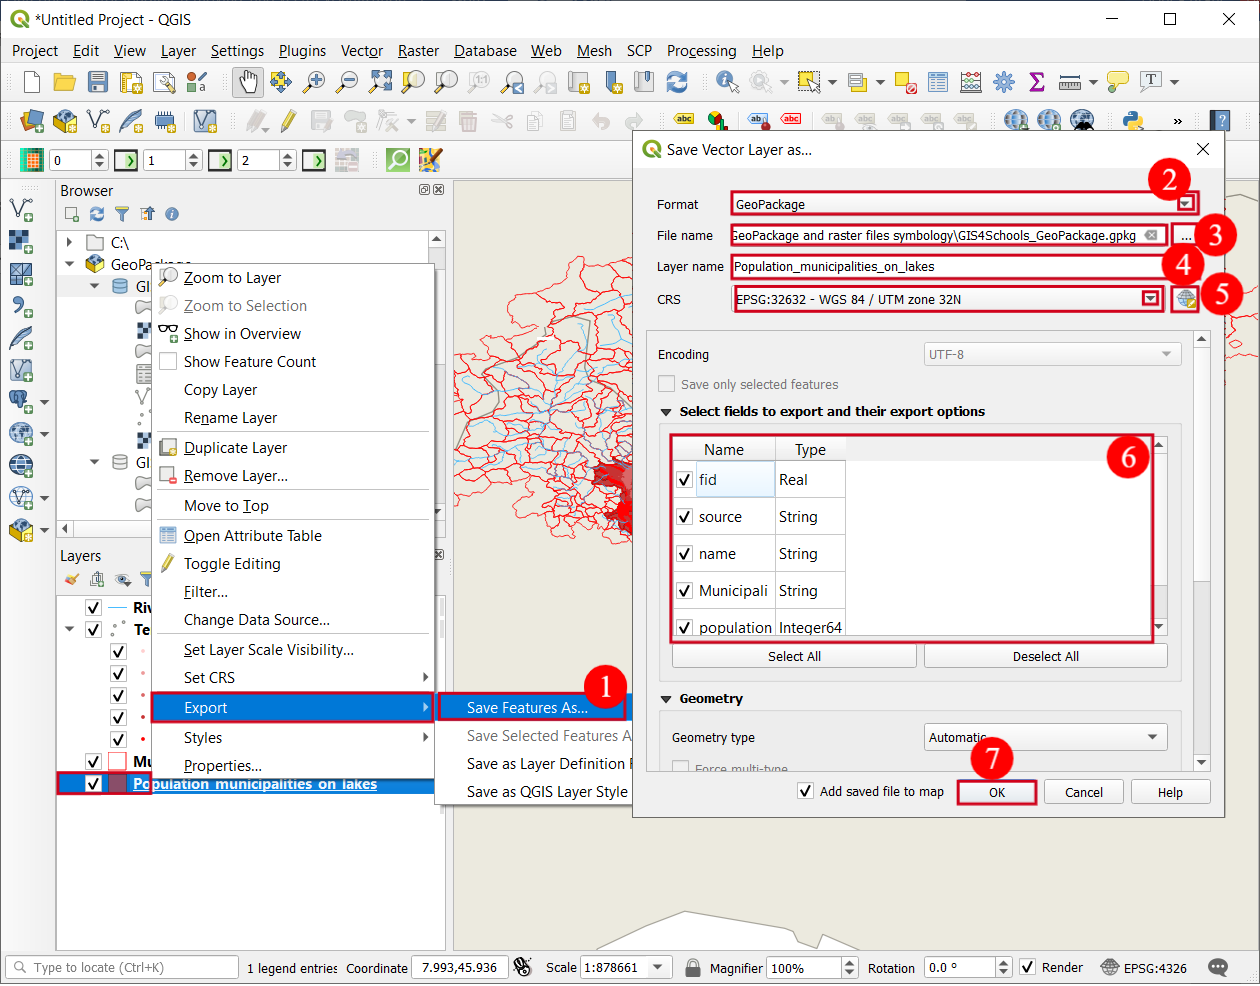
Fig. 1.7.4 – Add new layer to GeoPackage
If you Refresh (1) the Browser panel as shown in Fig. 1.7.5 you will be able to see the new layer in the list of layers of GeoPackage (2), but also it will be automatically loaded to QGIS (3).
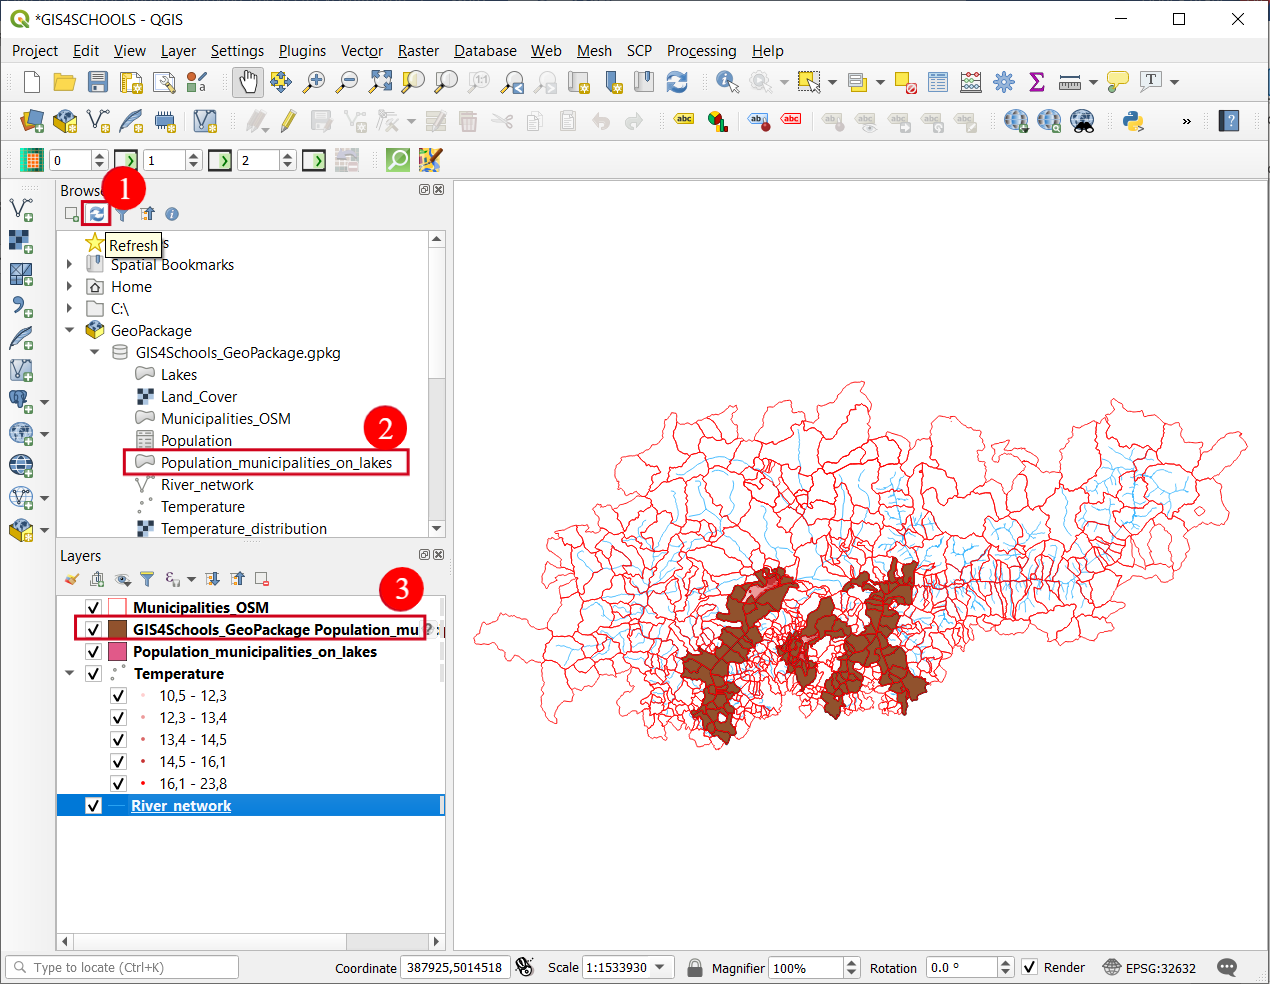
Fig. 1.7.5 – Result of adding a layer to GeoPackage
Since Population_municipalities_on_lakes layer will not be used we will remove it from QGIS, but also from GeoPackage. To remove it from QGIS right-click on the layer and select Remove Layer (1). Confirm the removal action by clicking on OK(2) (Fig. 1.7.6). In the same way we can remove Population_municipalities_on_lakes shapefile as it will not be used later on.
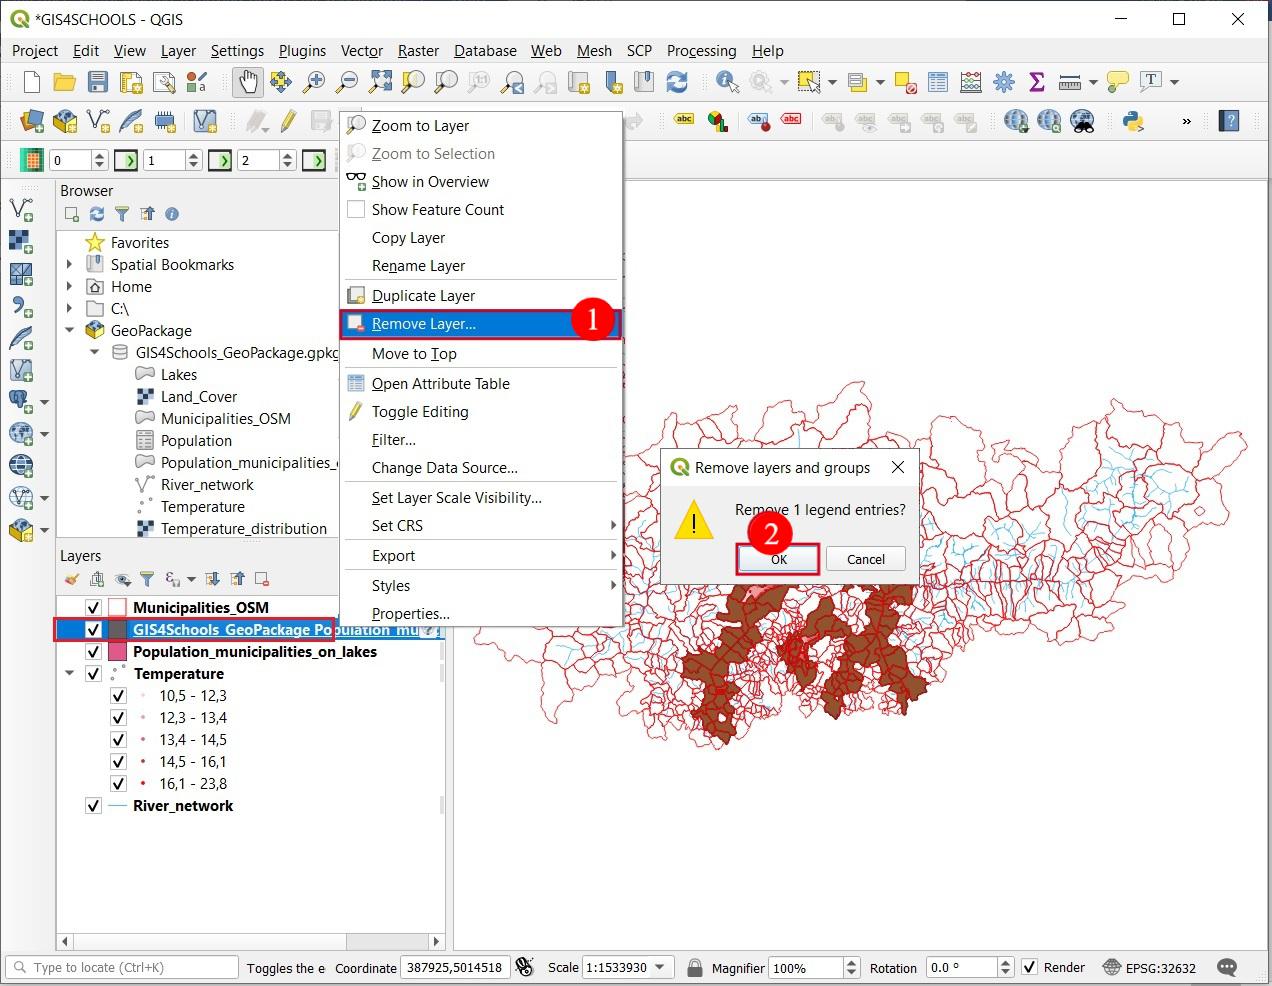
Fig. 1.7.6 – Remove layers from QGIS
To remove Population_municipalities_on_lakes from GeoPackage (Fig. 1.7.7) right-click on the layer in the Browser panel (e.g. Population_municipalities_on_lakes) and select Delete Layer (2). Then in Delete Layer window we confirm that we want to delete a layer (3) and to compact (4) GeoPackage database.
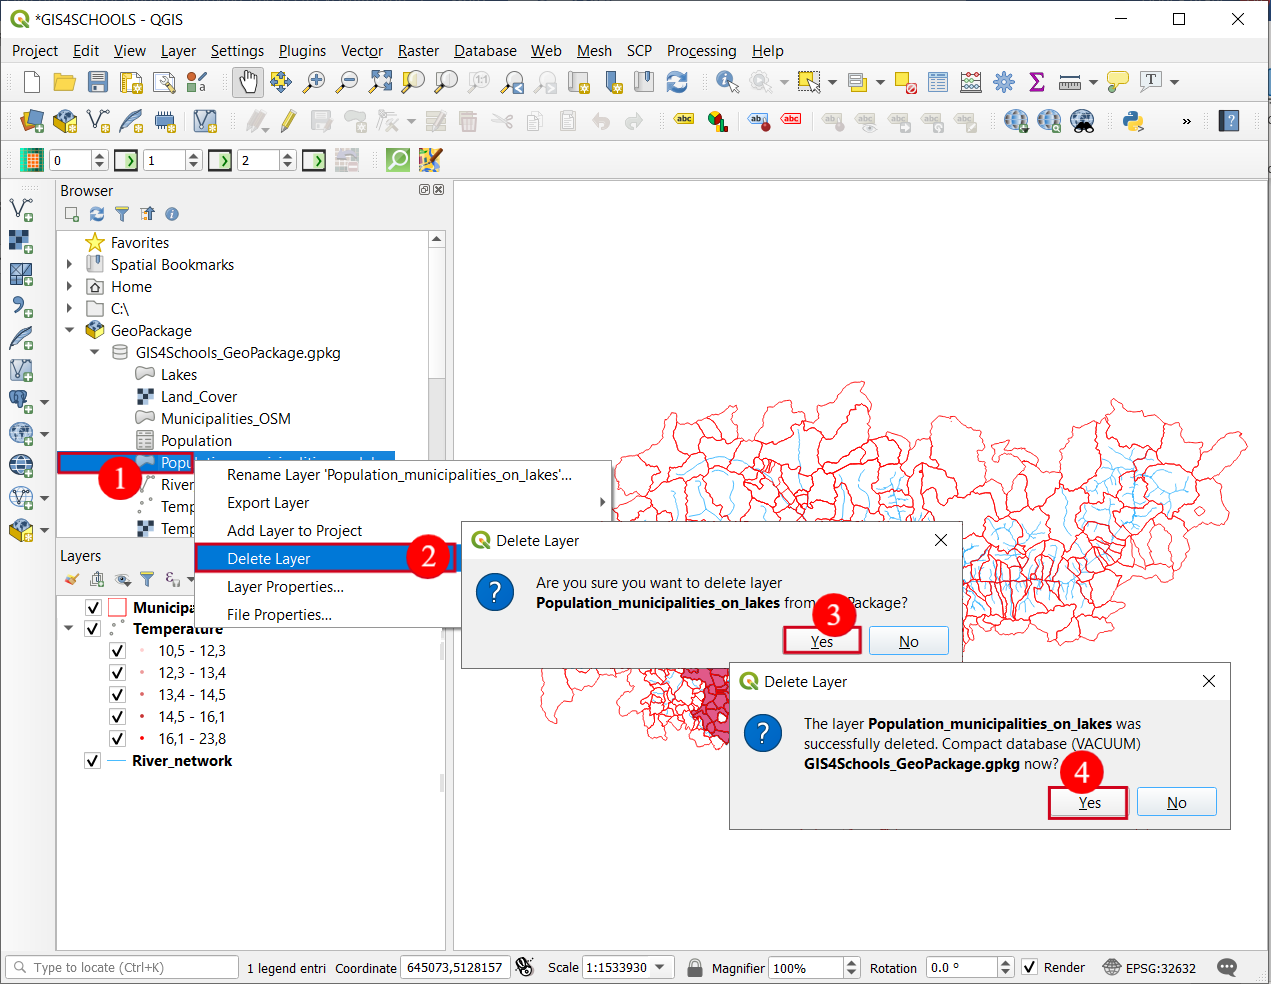
Fig. 1.7.7 – Remove a layer from GeoPackage